
SPINNAX SB1
Your SB1. Everything explained.
In the SPINNAX Skate App, you can also find these instructions anytime via the info button at the top of Recording and under Instructions in your profile.
Mounting
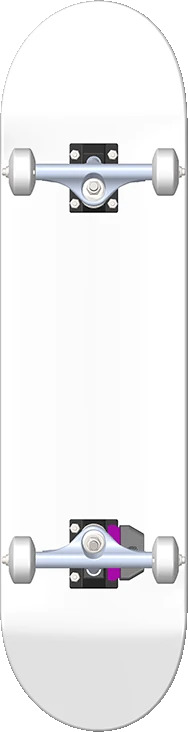 ↑ Nose / travel directionMount here
Viewed from underneath: rear right
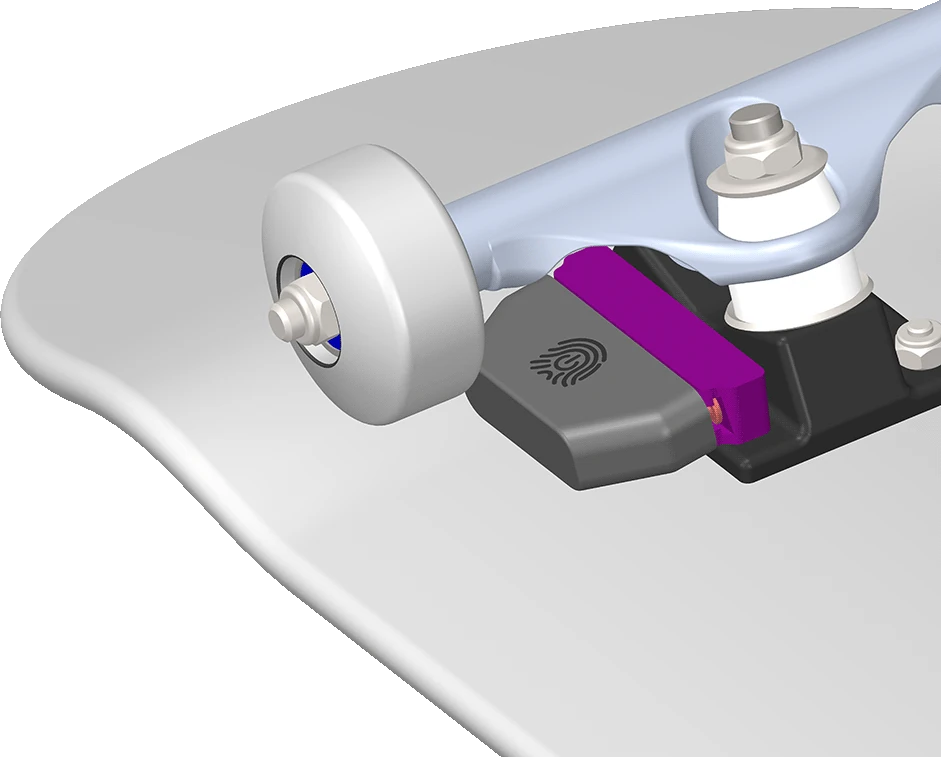
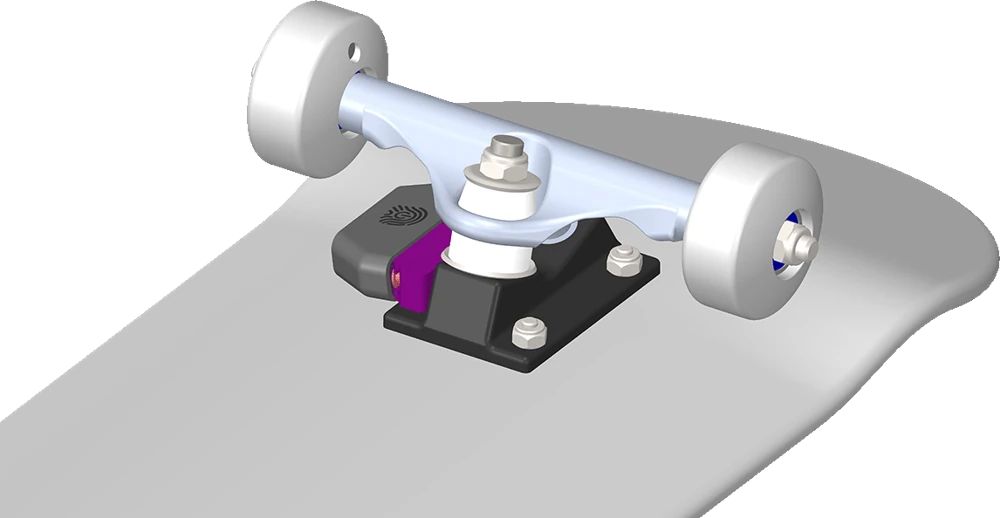
Place the board underside up with the nose at the top, as shown. Mount the SB1 at the rear right in this view. This fixed position enables correct trick detection for both Regular and Goofy.
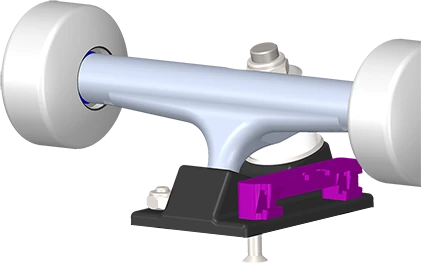
Attach the mount
Prepare your board, mount, suitable screws and skate tool. Attach the mount at the indicated rear-truck screw positions as shown. Both mount and truck must be secure.
View screws and mounting position
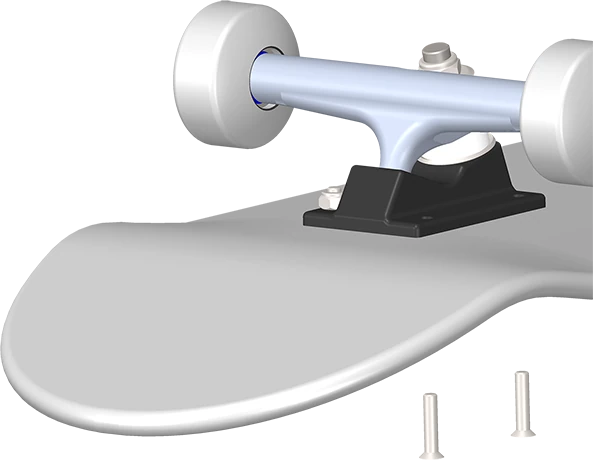
Fasten the mount at the two illustrated points. Use screws of suitable length for your deck and truck; every nut must engage securely.
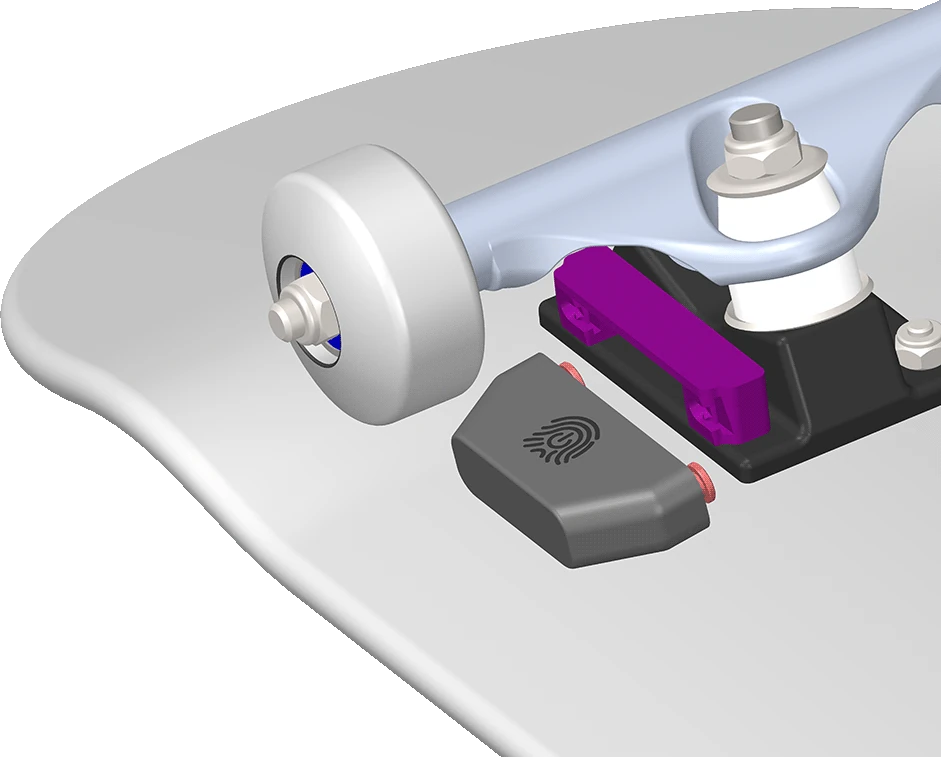
Slide in SB1
Slide SB1 fully into the mount as shown. Check that it is secure and cannot come loose unintentionally.
View fully inserted SB1
Prepare the inner face of the wheel
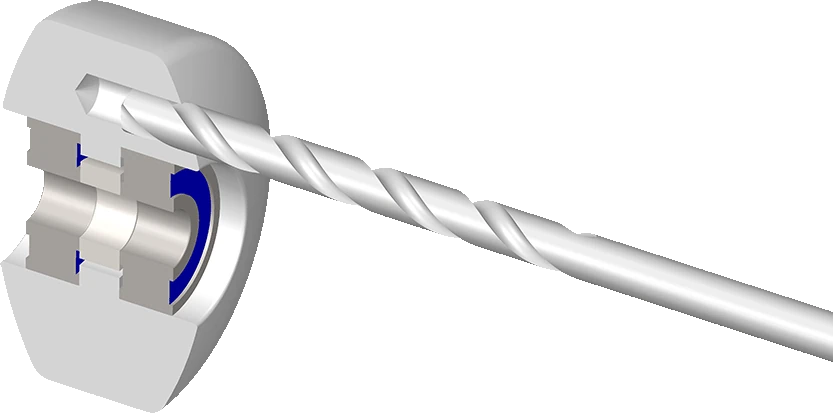
Remove the rear-right wheel next to the SB1 in the underside view shown. Mark a hole on its inner face approximately 17 mm from the wheel centre. Drill Ø 6 mm parallel to the axle, only deep enough to seat the magnet flush. Do not drill through: the outer face must remain intact. Do not damage the bearing or tread.
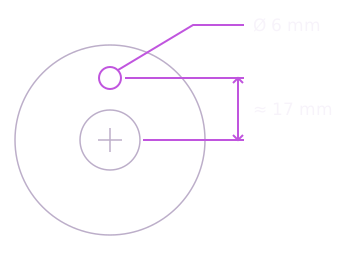
Ø 6 mm · Guideline: 17 mm radius
Pilot-hole tip
Optionally start with a 3 mm pilot hole to help guide the 6 mm bit. Secure the wheel and check the required depth against the magnet first.
Insert the magnet correctly
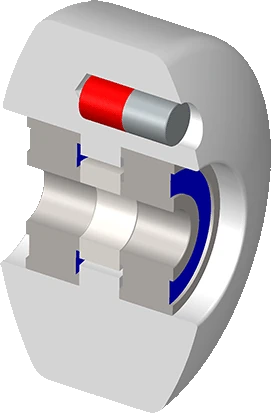
The magnet enables speed measurement. Insert the magnet from the inner face of the wheel: red end first into the hole, silver end facing SB1. Press it fully and flush into place. It must sit firmly.
Orientation relative to the sensor matters: north pole toward SB1, south pole toward the outer face of the wheel.
Reassemble and check
Reinstall the wheel. Check that truck, mount, SB1 and magnet are secure. The wheel must spin freely without touching the sensor.
Power on and off
Power on
Touch the power-symbol touch surface on the underside, then release. After a successful start, the green LED flashes twice.
Power off
- Touch and hold for about 4 seconds.
- Wait for three short green flashes. The LED then stays on until you release.
- Release. The SB1 then powers off.
Powering off is disabled during recording. Finish the recording in the app first.
A short touch while powered on does not reset the sensor or start recording.
These instructions apply to the new firmware with touch power control. Older firmware may behave differently. Updates are available in the sensor view.
SB1 does not power off?
Release after the three flashes. Holding too long cancels the shutdown request. Release fully before trying again.
Connection and help
Cannot find your SB1? Check the following:
- Power on SB1 and charge if needed. Normal green flashes have long pauses.
- Enable Bluetooth and allow Bluetooth access for the app. Grant required system permissions when scanning.
- Keep SB1 nearby and disconnect it from any other phone.
- Scan again. Check for a firmware update in the sensor view if using older firmware.
Charging and LED signals
Green: one short flash about every 8 seconds
SB1 is running normally. The LED is dark between flashes. Check connection and recording status in the app.
Red: charging
The red charging LED works independently of the power state. Off can mean fully charged or no charger connected.
Green: two repeating short flashes
Recovery mode: recording is unavailable. Connect SB1 for diagnostics or a firmware update.
Green: three repeating short flashes
A previous restart was saved for diagnostics. Recording remains available. Check the sensor diagnostics if problems recur.
Read flashes in context: two immediately after startup confirm power-on; three after a long touch confirm shutdown. Five during shutdown indicate a rejected or failed attempt.